"For more than a thousand years
the shadow-cloaked riuns of Shadespire lay dormant,
a malevolent scar in the centre of the vast Desert of Bones."
Hi there, and good morning!
Finally, after years of painting, an Airbrush made landfall on my shores. Ok, this is not entirely exact: two Airbrushes have landed on my desk... the first one, a beautiful single action Badger, survived just long enough to make around forty models and then it was sacrificed on the Altar of Learning. I've nearly destroyed it in the process of really understanding how an Airbrush works; but no problem, a lot of spare parts are coming (although they are taking too long to arrive), so I hope I'll be able to save it from the edge of oblivion.
The second one is an awful, but double action, Fengda, paid around 20 euros (!!!), that made my whole Flesh Eaters Courts army thanks to the sacrifice of his predecessor. And, double action is awesome. Now I'm planning to buy an Iwata and use these three pens to improve my airbrushing skills.
Another example of models made with my double action Fengda is my Shadespire Stormcast lot, in particular their bases. Stormcasts armour and weapons have been made in the classic Guardians of the Ages way, but bases reflect the gloom of the Mirrored City.
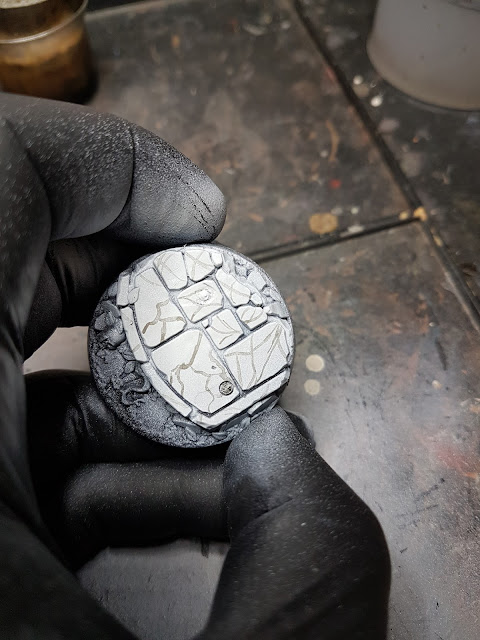
Secondly, having in mind to make tiles in a sort of dirty marble, I airbrushed them, avoiding the darker earth areas, in Vallejo Usaf Light Grey, just as this:
Then I added tiny strokes with Nuln Oil, to replicate marble's veins.
I washed all over with Seraphim Sepia (slightly diluted with Forge World Medium and water) always airbrushing and to make more movement I sprayed just air from right to left before the mixture was fully dry.
I sprayed all the other parts of the bases with Vallejo Olive Drab.
Reprised for the 90% with Nato Brown:
And then darken in a few spots (such as recesses, or the statue's mouth like showed in the second following picture), with Burnt Umber, and Burnt Umber mingled with Black:
To finish the job I painted creepers and leaves with a classic layer-highlight technique using: Mechanicus Grey, Dawnstone and Administratum Grey, adding a final touch of White Scar.
I added pigments too (Forge World Black Soot and Dry Mud) to enhance the sensation of depth.
Final shots for the bases:
And with the models above in showcase:
Thanks for reading!
Happy painting!


No comments:
Post a Comment