
Billy Rosewood
Why does the ludicrously ginormic mace of LOTR's Witch King work on the screen while Alluda Majaka's sliding horse won't?
Even if it's pretty hard not to notice it, the main reason is not good or bad FX, but context and plausibility.
The mace looks and behaves like a massive piece of metal, the wielder looks and behaves like some sort of malevolent supernatural being, therefore the silly mace doesn't make us laugh.
On the other hand, the horse and its handler... well.. I think they speak for themselves.
But why this digression?
In my opinion, scale models and miniatures share a lot with the visual mechanism of cinema.
If you think about it, you can build and paint everything you can imagine, regardless of whether it´s real or not.
That being said, the fact that you could, doesn't mean that you should.
Almost one third of the whole kit of a single Dunecrawler is weaponry, and I had two of them. The temptation to overload the creature with everything because "hey, it's 40k!", was great.
But, on the International Badass Scale (that I've invented right now) you want your creation closer to "Witch King's mace" than "sliding horse".
Now let's get back to our beast.
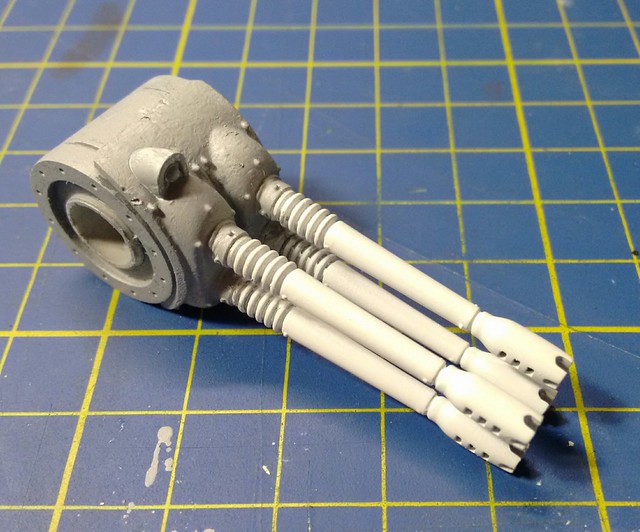
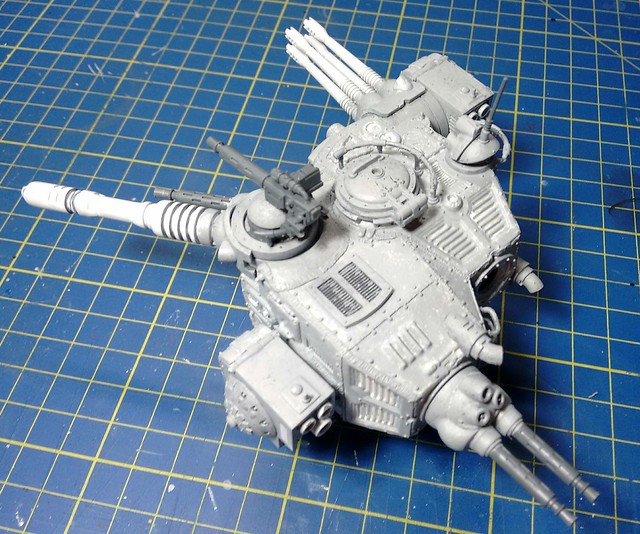
When it comes to armament, every mech/tank has its eye-catching feature. The twin autocannon reminded me of the ZSU-23-4, so I cut and enlarged the cylindrical joint and simply glued together the two mantlets.
It protrudes from the chassis line, but it's not a big deal. The whole structure is highly asymmetrical and even with the rocketlaucher it doesn't reach the same width of the side hull.
Aligning the barrels can be fiddly, but in this case we are blessed with a perfect cross exacly on the muzzle breaker: two small styrene rods will do the trick, while the glue dries.
 |
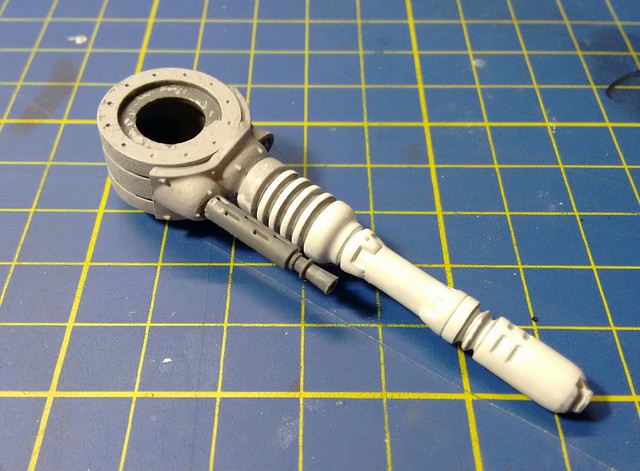
| Pretty high on the IBC |
The heraticator beamer looks goofy if tilted, the twin phosphor blasters are too stubby, but the laser cannon with the coaxial stubber is simply perfect.
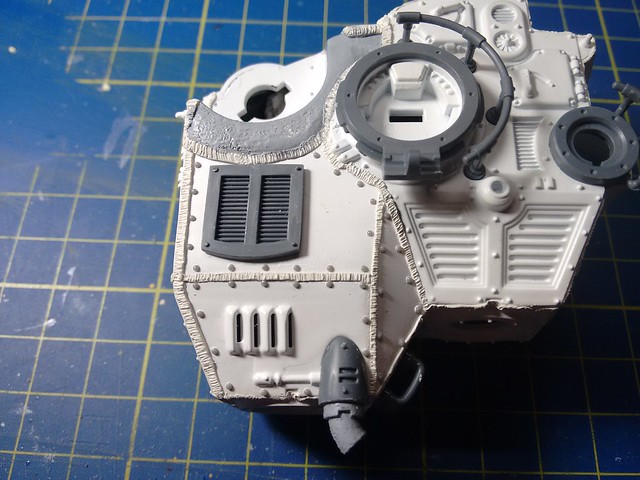
The hole will be closed using the spare sensor cupola, but to diversify the structures, it will be sanded to resemble a simpler hatch.
Since another engine would look quite boring (and silly given its position), we have an additional hole to take care of, on the stern of the double hull.
We still have a spare semisphere from the original legs' structures, so why not a tailgun?
At the beginning I tried with the twin phosphor blasters, but it was a bit too oversized. The heraticator was dangerously close to the "sliding horse" end of the scale, so I opted for the stubbers
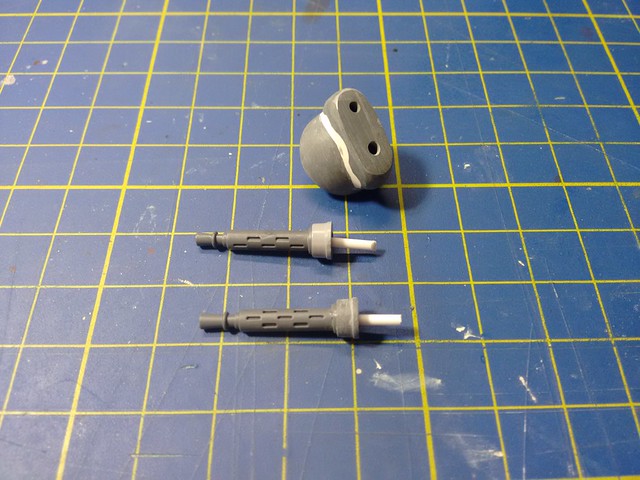 |
| The styrene will add solidity and help with the alignment |
Some welding beads will recall the main structure and add a bit more complexity.
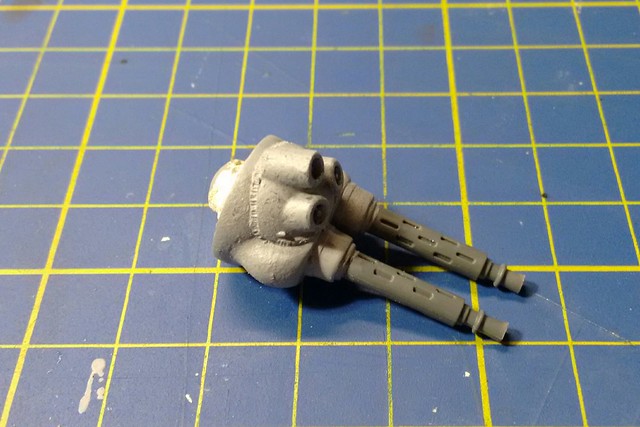 |
| Remember to drill the holes on the muzzles |
One of the most prominent features of the dunecrawler is the conspicous number of rivets, so it's time for something as boring as high paying at the end.
Make a guide using a post-it, and use it to align and space the rivets apart. After that use a small amount of ultra thin glue (personally I use the Tamiya one) to pinpoint the rivet as you would do with a wash.
Don't worry if the rivet drift apart a bit, you have some time to move it back.
Above all at the beginning don't work with more than 3/4 rivets at the time, or the glue will dry.
In that case, use caution and a sharp razor blade to remove the misplaced rivets.
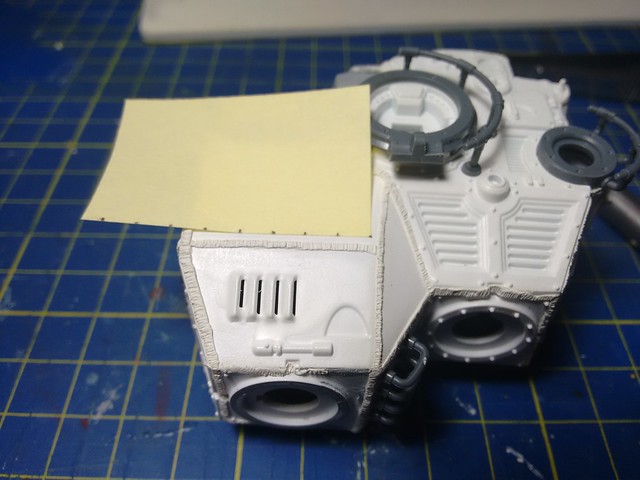 |
| Use the existing rivets to draw the rebuilding the pattern |
The plastic is quite solid, so to bring the plate to the proper thickness, use a bastard file (or a two handed one har-har-har... sorry).
If you take a closer look, you'll notice a "blob" of primer near the exhaust. Don't worry, we still miss the texturing phase and that will be fixed using liquid putty.
In other cases you can get rid of it with sandpaper or dabbing some primer thinner using a brush.
 |
| In our case, some imperfections will help the final look. |
A sharp scalpel, some putty and sandpaper will, as always, fix the problem.
We will clearly had to temporary sacrifice the rivets, but as you have seen, replacing them is not that hard.
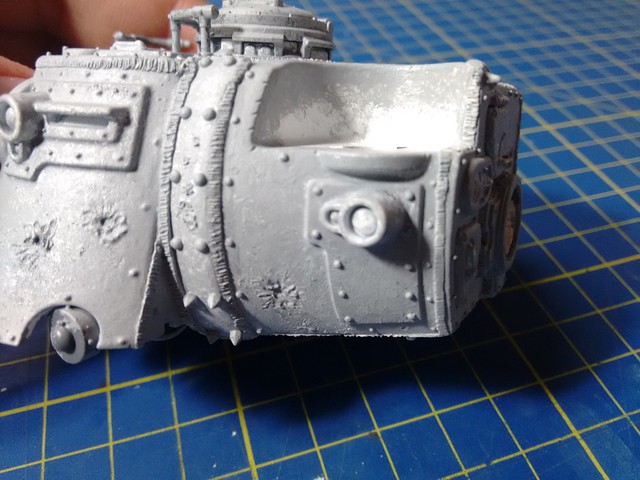 |
| Some battle damage will make just the beast angrier |
Remember the scale. 40k vehicles are something between 1/35 and 1/48, so we need something decently subtle.
Use some scrap to test the thickness of the liquid putty, and remember that the thinner evaporates quite quickly, so use it on safe conditions (mask & proper ventilation are mandatory) and re-thin when needed.
Putty thinner is normally acetone-based, so be careful and keep a couple of old brushes for that specific purpose.
 |
| The small bits on similar pieces makes the real difference |
A bit more details and battle damage on the leg plates, and we can complete the texturing on the lower part too.
A couple of handles and some dents will suffice.
Remember that battle damage works better when its pattern makes sense.
Bullets hole on the same line are ok, perfectly distributed dents and scratches are not.
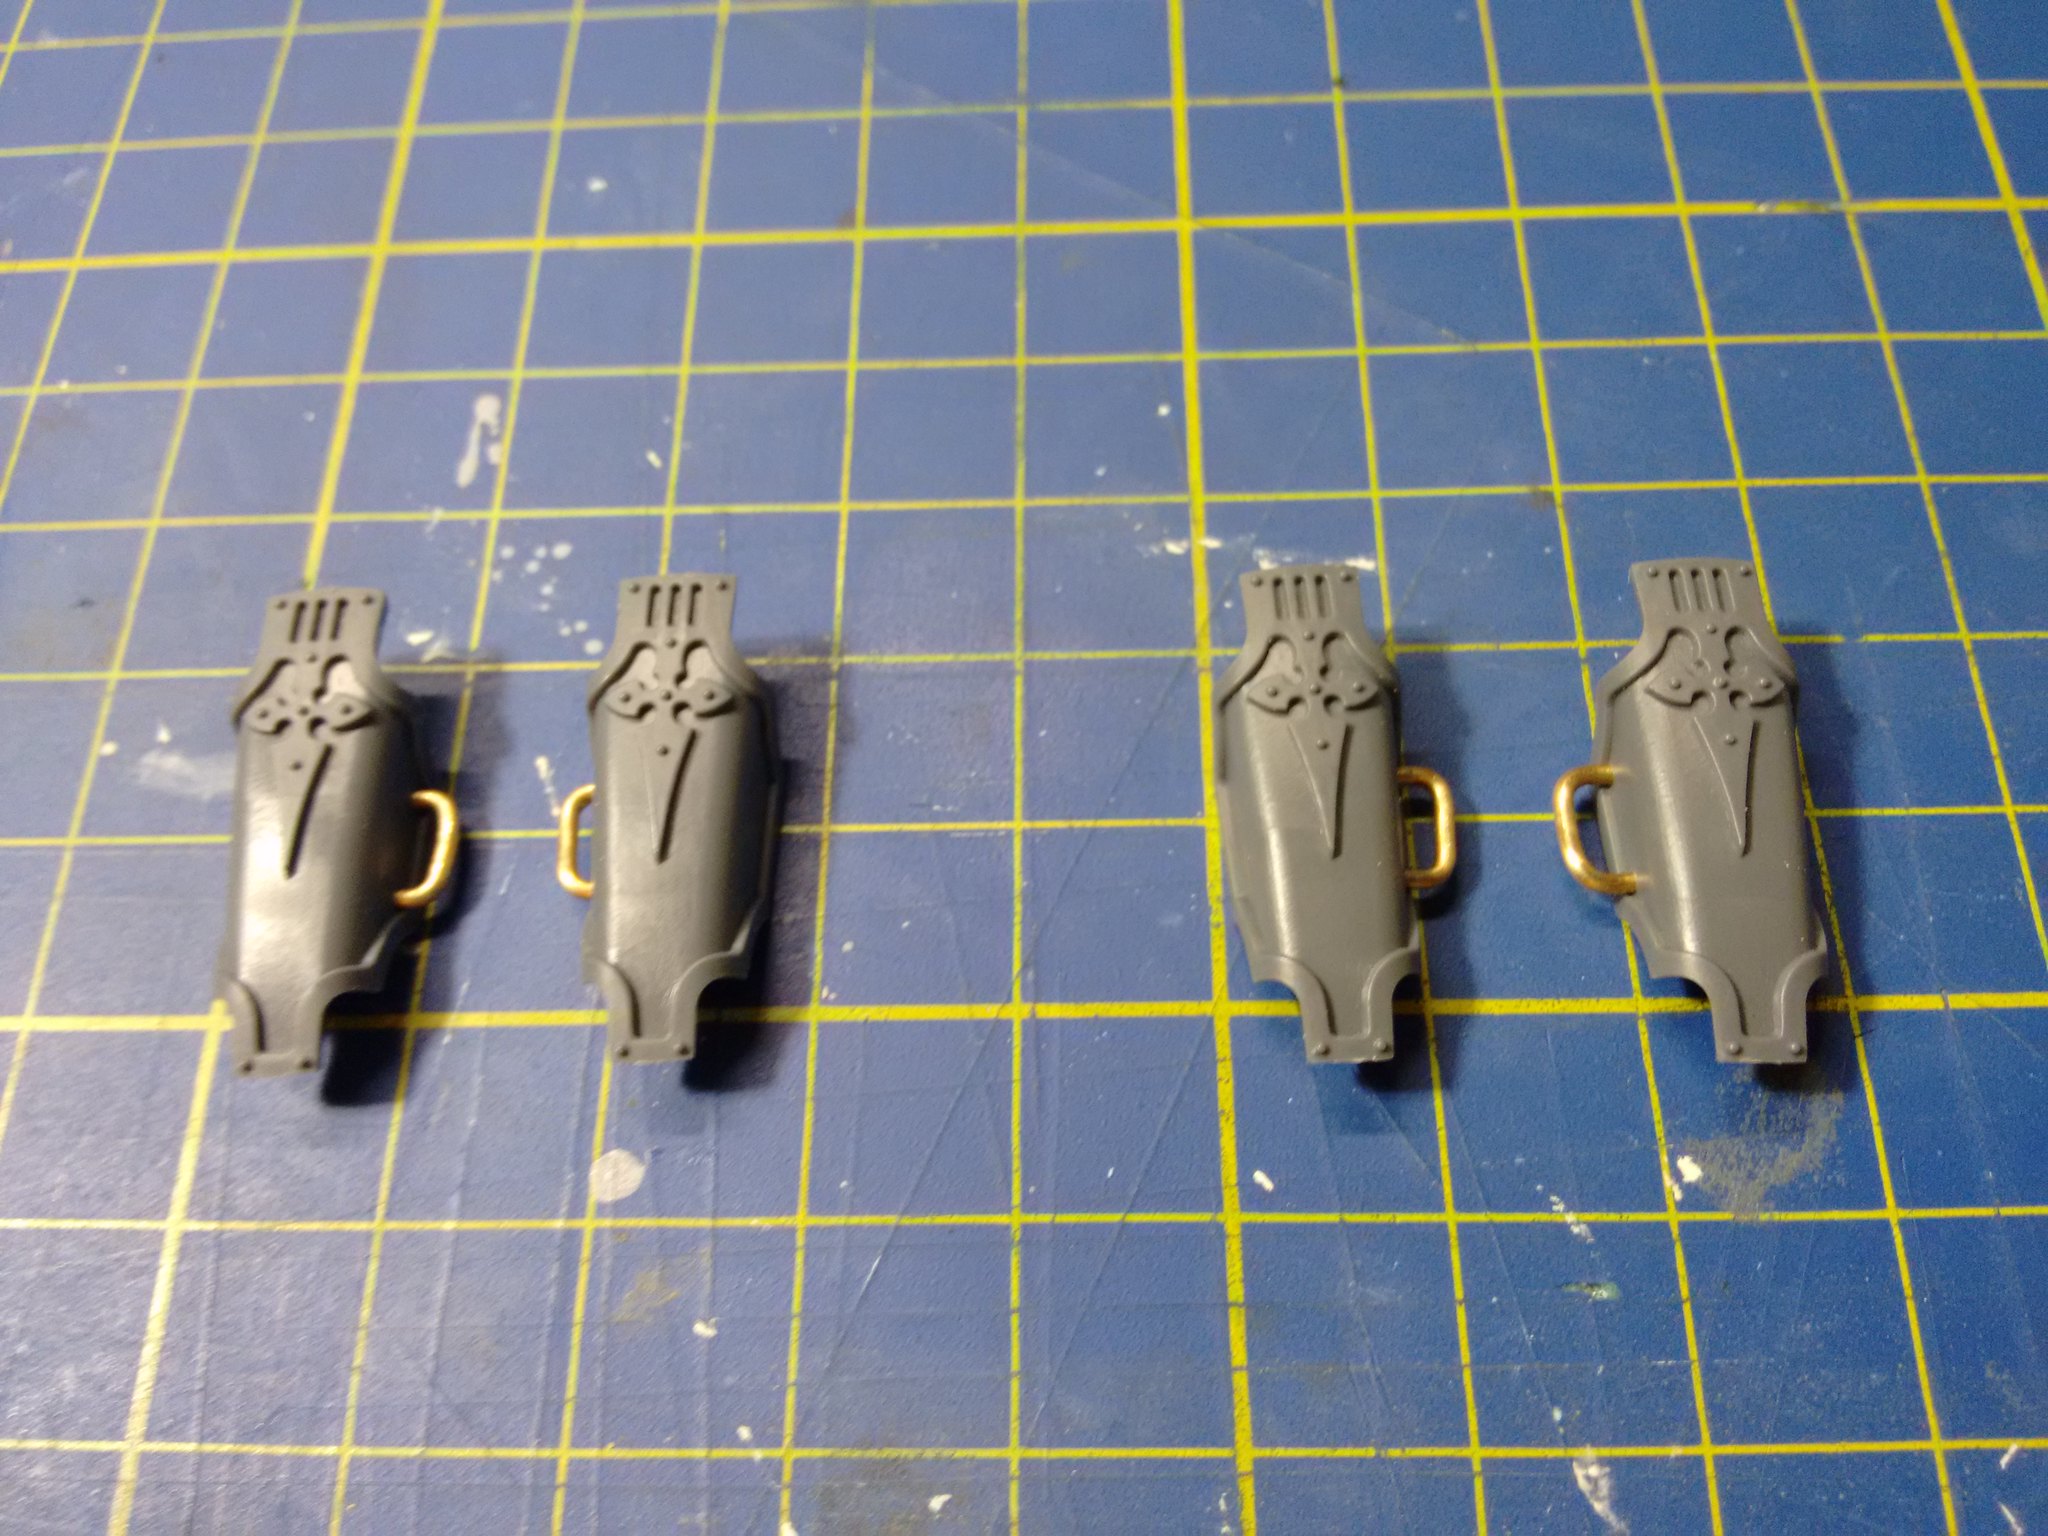 |
| Don't look for dents. I took the photo too early :p |
When texturing, use a thicker putty the closer you go to the terrain and, similar to battle damage, follow a realistic pattern. Legs and moving parts closer to the ground will be dirtier, front armor will be more exposed, etc...
As always, a photographic reference helps a lot, and Flickr is full of free hi-res photo.
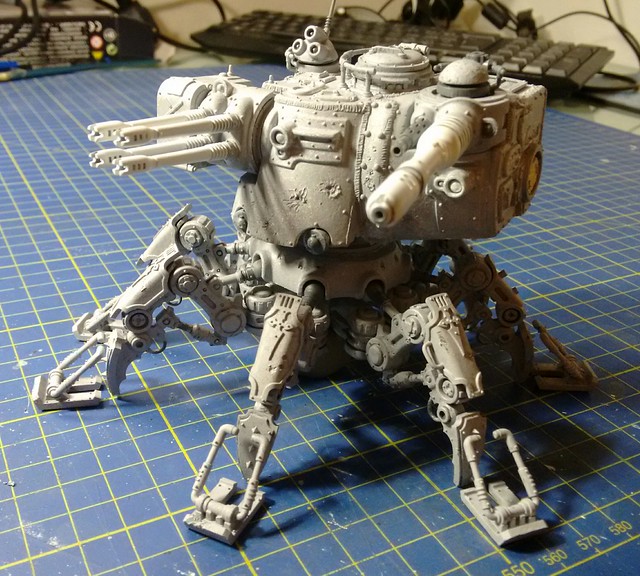 |
| Steady on the "Witch King's mace" side of the IBC scale |
No comments:
Post a Comment