Thor
I was born as an aircraft static modeler.
In case you hadn't ever known one, we're the closest thing you can imagine to the "Diagnostic and Statistical Manual of Mental Disorders" definition of obsessive–compulsive personality.
Not the generic "Oh my god, I can only eat blue M&Ms, I'm SO OCD!".
It's not trying being fun, I'm dead searious.
Tankers are the masters of realism.
Ship people are masters artisan.
Miniature painters are masters of color.
Aircraft makers are simply batsh*t crazy.
 |
| "Did I saw some something yours on Finescale Modelers?" |
Let's take just the camo pattern.
It's not enough just being historically accurate. It has to be perfect.
The same exact pattern of that particular aircraft of that particular squadron of that particular version of that particular series.
Did you get the picture?
 |
| There is no "Olive Drab", only Federal Standard 34087. |
Strangely, the last batch of the frustrating Bloodreavers kicked in some of the the "good ol' me" but I think I was able to keep it under control and learn a couple of decent tricks.
"The not-so-obvious brush problem."
During the first fifteen bastards I had some problems keeping the paint wet on the tip of the brush, above all when working around small details. The thing puzzled me a bit, since I've always used the brush on tanks and mechas and I've never had that kind of problem.
The main difference are the pauses . Vehicles have large unobstructed surfaces. On miniature I'm constantly changing grip and testing the right angle under the lamp.
More time between the strokes, plus some lamp heat, equals involuntary dry brush.
The solution was switching to brushes a bit bigger (1-2) with longer bristles that could preserves the moisture for a longer time.
Using bigger brushes lead to the adoption of another positive habit: loading just a really small portion of the tip.
90% of my major mistakes were caused by accidental strokes while moving in narrow bits, so a reducing the "dangerous" surface of the brush, reduced the mistakes too. Less frustration, less mistakes.
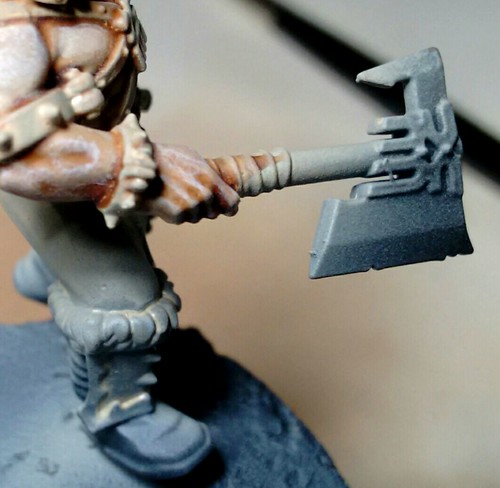 |
| Finally something decent |
"You can't hit what you can't see."
Masking a miniature IS boring, but nothing compared to repainting and entire area sprinkled with tiny flashy metal flakes.
I had some Silly Putty that I normally use for keeping pieces in place while airbrushing, and it works perfectly in addition to a small spatula to seal contiguous areas.
Just a note, Silly Putty is less "stable" than Blue Tack/Patafix and similar reusable putty since it tends to "drip" in just minutes, but I prefer it since it comes away in a much cleaner way.
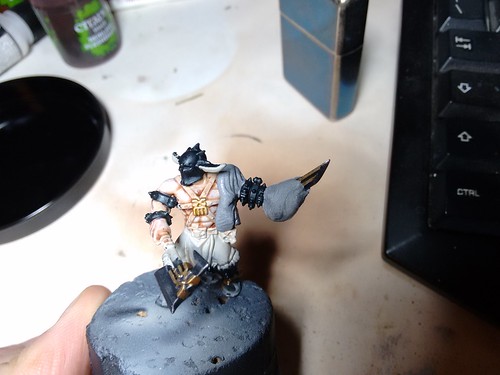 |
| Nurglish! |
"Don't experiment big feature while half way."
At the beginning seemed like a good idea.
I already planned some different tones to break the monotony of the squad, and tried some minor adjustments with the first five guinea pigs.
But I wanted some more and I tried a more pale schema.
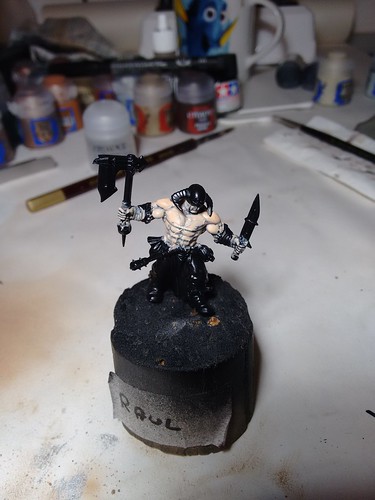 |
| "Witness me!" |
Not so bad, if taken alone.
Problem was that armies needs consistency, and even if I was a bit more skilled on skintones, the result were too uneven if compared with the other miniatures.
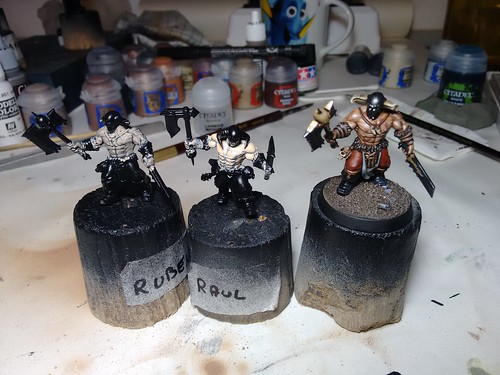 |
| Excuse me, am I late for the "Game of Thrones" audition? |
The further attempt to correct the global hue via airbrush was even more pathetic.
I still lack the right amount of the knowledge to filter fleshtones, so the result of a thin layer of a warmer pink was a strange and inconsistent misture of cold and warm tones, all arrange in the worst possible way.
Time for another bath in plain thinner.
 |
| "Mediocre, Morsov!" |
Luckily this set down my overconfidence and with my greater surprise I achieved my best fleshtone so far with an unusual (for me) tactic.
Since I'm not good at finding the right light points on all the surfaces while painting, I've started with a first drybrush with a quite large brush and a tone just a little bit lighter than the base, stroking only in one direction (from top to bottom) simulating some sort of coarse azimuthal light.
In this way the ligher bits of paint were applied only on one side and gave me a general idea on the point I should insist more while highlighting in the normal way.
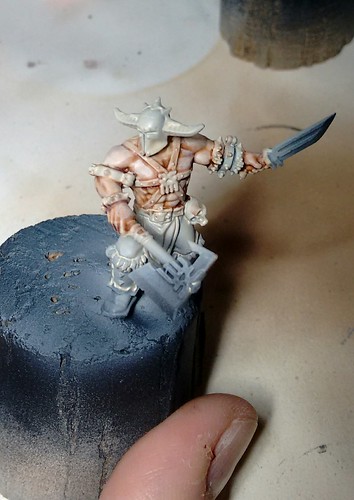 |
| Raul in all its splendor |
"Play with minor details."
On the other hand, play with minor details can break the monotony of batch painting and add character to the army.In addition you can experiment some tecniques you're less familiar with, using bits that you can easily repaint if not satisfied.
For instance I've tried some very simple wet brush on the pouches and the skulls.
 |
| ..like Amando and its fashion pouch |
Furthermore, I wasn't satisfied (and I'm still not) with the leather details and the loincloth.
So I tried some minor adjustments using washes and the stippling for the various details, but still working on the same basecoat of the other units.
In this way, when I achieved a better result, it would not "broke" the general look-and-feel, but still be pleasant to see.
On the other way, in case of disaster, I could easily mask and reprise the basecoat to start almost from scratch without ruining the good parts.
Another good tip came from Jonathan that suggested to reprise here and there the color, or the tone, of a main feature, since on small subject the eye need to be "guided" through the schema.
Above all in an army when you can't catch every detail just in one go.
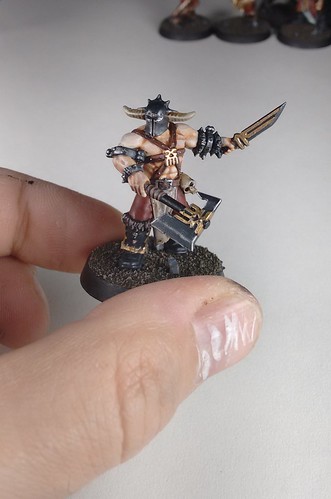 |
| ..or Raul and its almost decent leather straps |
"It's good when it's over."
It was strange, but even if I was constantly unsatisfied with my result, even perceiving that I was getting a bit better, I was truly happy when I took the last photos.
Ok, I was extremely happy to finally getting rid of the fuc*ing Bloodreavers, but *also* about the result achieved.
Above all, when thinking about the remaing tons of miniature that awaits me in the box, I'm not in anguish anymore.
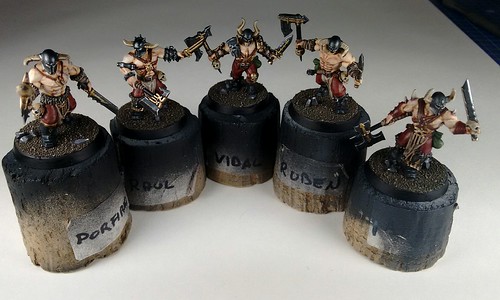 |
| Say hello to Porfirio, Raul, Vidal, Ruben and Amando |
The overall look was pleasant, and I was surprised comparing the first completed Reaver (Galtero) with the last batch. Even if they look as if they were painted by differents hand (and from a certain point of view, they had) the general look-and-feel is uniform..
Anyway, just for the record, counting the various repaint, the first and the last miniature are separated by a steady 40/45 paintjobs.
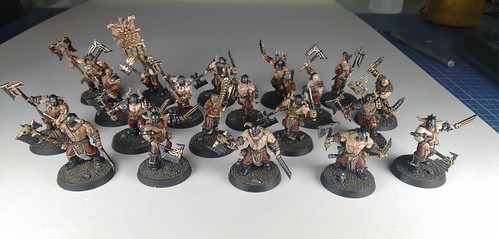 |
| The Mariachi Warband of Khorne! |
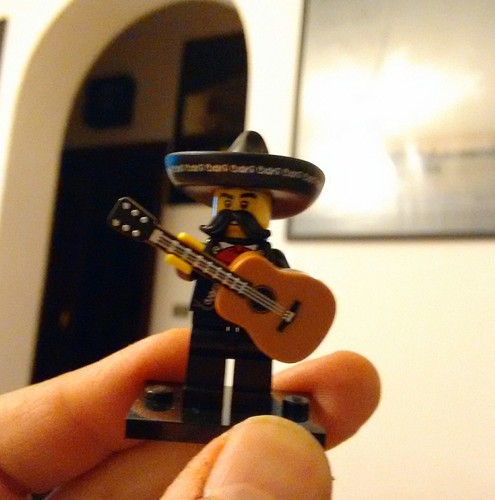
"Bonus: the future warchief"
Just for you: the unofficial general of the Mariachi Warband of Khorne
 |
| "Mustache for the mustache god!" |
In case you miss the previous part of this article, you can find it here.


No comments:
Post a Comment